
That night, CG had to work late and I was faced with a messy house, a DVR full of nothing but kids shows and a book club book that I was really not enjoying.
So I did what any self-respecting person would: I decided to make fabric gift bags.
Back in January, inspired by Soule Mama and full of new year's resolution energy, I bought some holiday fabric on sale imagining I would make fabric gift bags "some time this summer". That way, when the holidays came around, I would be ready with homemade fabric gift bags to wrap presents with and wouldn't stress out by adding extra crafting things to do around the already crazy holiday time.
(Just typing that, I am officially impressed with myself. Being green, planning ahead, taking care of myself, ALL OF IT. GO ME!)
Did you have a crappy day? Want to make some fabric gift bags? It's fun! And you'll feel so on top of it! JOIN ME!
 1. Artfully arrange your fabric and ribbon selection and take a picture.
2. Decide the toy clutter in the background muddles the photo. Leave the clutter, take another photo, clutter a little less visible.
 3. Set up your only-used-for-sewing iron. Take a photo.
 4. Take another photo from a different angle that proves the iron is plugged in! And turned on!
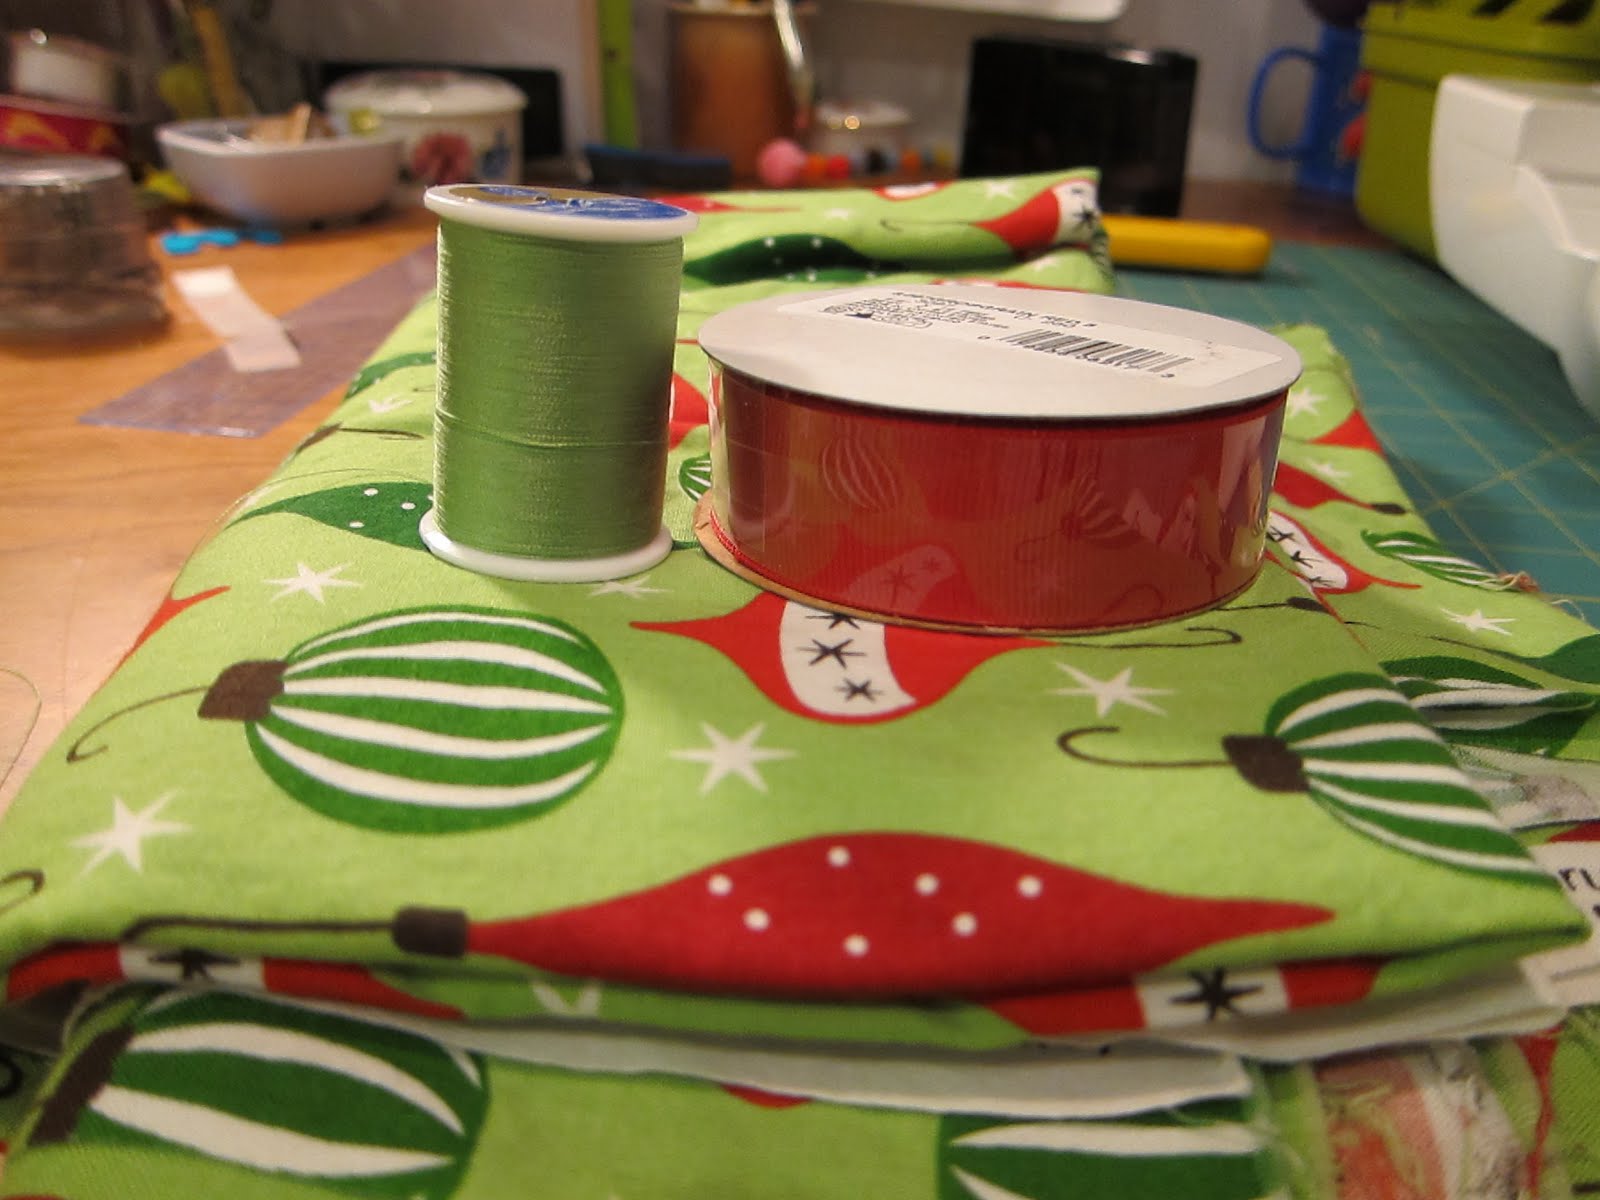 5. Select the fabric, thread and ribbon for Fabric Gift Bag 1.0
 6. Plug in, thread and bobbin the sewing machine. Lay out fabric. The instructions say to make a long rectangle. Get scared, as you prefer to be told EXACTLY what to cut.
 7. Fold fabric in half, good sides together. Eyeballing it - living la vida LOCA!- cut a very poor semblance of a rectangle, complete with jagged uneven edges. (AH CRAP.)
 8. Measure, mark and carefully trim into an actual rectangle.
 9. Sew (FINALLY!) a half inch seam on each side.
 10. Ignore the suggestion of "French Seams" as they are clearly too fussy for the likes of you. Instead, trim seam edges with pinking shears because it looks pretty (and to keep the fabric from fraying.)
 11. Fold over the top edge a little less than 1 inch. (Look at me! I'm actually measuring a true inch!) Fold again another inch and pin.
 12. Put fabric in machine, trying to convince yourself that you don't really need to press this seam first. Almost start sewing when you come to your senses. Press the damn thing to be sure your seam will be even and lovely.
13. @#*%($&@#$%! But I pressed it! I DID. WHY IS IT NOT EVEN AND LOVELY?
 14. Cry a little. Gnash your teeth. Tell yourself that it's just a fabric gift bag, move on and cut two pieces of ribbon. Cut it long since you have no idea how this will actually work.
 15. Turn the bag right side out. Fold one inch at the end of the ribbon and pin to the middle of the top edge of the bag.
 16. Oops. Pin the other way. I think. Sew that m-effer and quickly do another one on the other side because YOU'RE IN THE HOME STRETCH GO TEAM WIN. (Editor's note: This last step is WRONG. Consult the real directions for this part.)
 17. You're done! YAY! Now go get the nearest thing that might fit in it and wrap that sucker up while singing "Rudolf the Red Fingered Sewer".
 18. What. The. Hell.?
 19. !*(@%*$#$%*!!
 20. Okay, I sewed the ribbons wrong. But this sort of works. Shut it, I'M GOING WITH IT.
 21. Beautiful! Fun (mostly)! (Don't look too closely.)
(Yup. Probably a good idea to just read the real instructions here.)
7 comments:
Toooo funny. :) I like your "SHUT IT" and "GO WITH IT" attitude. :) I think I will check out that tutorial. What an awesome idea!
I used to say that I loved to sew. Recently, I have realized (after over 20 years of sewing) that I do NOT enjoy sewing. What I enjoy is having a finished product. The actual process of sewing, though? PAINFUL. There are just too many damned places to ruin the whole project: the cutting, the stitching, the ripping, the finish work...oh, the PRESSURE! But I do enjoy the satisfaction of the finished product, so I do it anyway. However, unlike you, I need to be in a very Zen state of mind to start sewing, or it actually puts me in a horrible bad mood. Crazy. :)
(This is completely the opposite of my knitting. I knit for the pure tactile joy of knitting. I often do not care if the project ever gets finished--hence the 50 billion unfinished knitting projects in this house.)
Love the bag and that you not only planned ahead, but did it (if it had been me, I would purchase the items ahead of time but forget about them for about 3 years). I will try making some of these ... maybe with fun summer fabric. Great post!
I am not the audience your tutorial is meant for, as I asked at this afternoon's Brownie Information Meeting, "Am I going to have to SEW badges on sashes?" I don't sew. At all. Not even a button. (My mother is ashamed of me, and rightly so.) But I AM highly amused at your project and admiring of your end result. Way to turn a bad day around!
I'm just like Rebecca; I truthfully can't stand sewing but I love having sewn. I try to make sure I always drink wine while I sew. It makes me sew worse but care less. :)
But hand-sewing/embroidery is different! Give me a row of x-stitches to do and I'm all "ohhhmmmmm...."
Hey, that was a gift for us! I laughed (with you?!?) all the way through. Thank you!
I was about to send this to FourteenCountess, but I see she's already been here!
Dorothy Parker once said, "I hate writing. I love having written." I think that applies here too.
Love love love your sense of humor.
Post a Comment